 for Monster Hunter Wilds")
Final Fantasy crossover quest brings a much-awaited surprise to Monster Hunter Wilds. Instead of an iconic monster, it instead showcased Omega Planetes, a dimension-hopping invader. Unlike many of the creatures you’ve faced in this series, you’ll need special strategy to quench its hunger. In this guide, we’ll cover essential strategies, loot drops, and the gear you can craft to beat Omega Planetes boss in Monster Hunter Wilds.
How to Unlock and Fight Strategy for Omega Planetes in Monster Hunter Wilds
(Click to expand)
Before you can face the otherwordly invader, you need to reach certain prerequisites first:
- You have to reach HR41.
- You have completed the “What Lies Ahead” Main Mission.
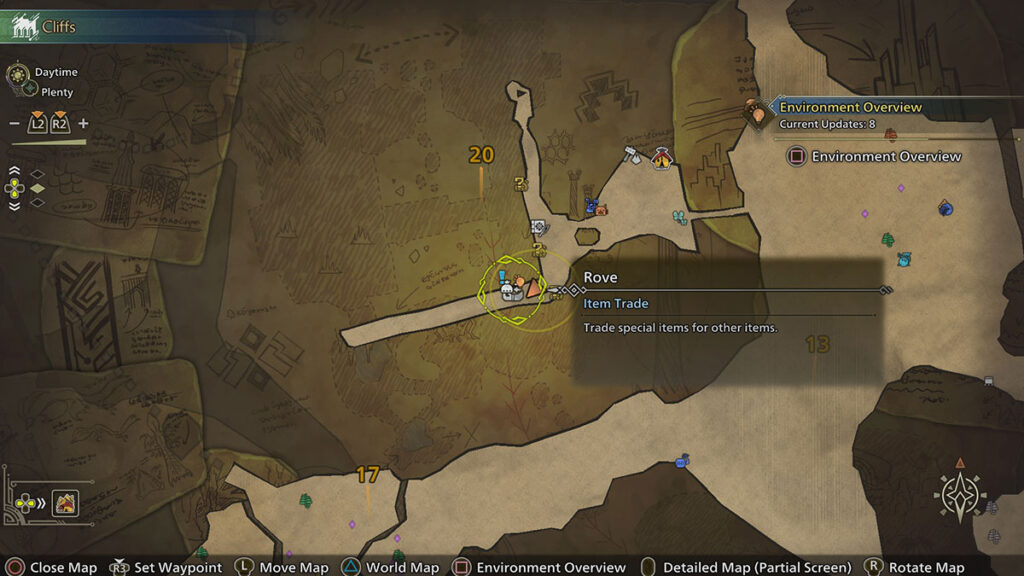
Then, speak with Rover in Area 20: Ancient Room Pop-up Camp spot and start “The Beacon of Invasion” mission. You’ll be introduced to many of the crossover quest features and mechanics. One of them is the unique Nerscylla Clone that comes with laser based attacks. Most of Nerscylla Clone’s new moves can be blocked. However, blocking the forward exploding laser attack requires Guard Up and high Fire Resistance. Otherwise, the chip damage will kill you.
When you have defeated Omega Planetes and reach HR100, you can challenge the much harder “Planetes Protocol (Savage)” version. It can be accessed through the Event Quest menu.
Omega Planetes Strategy
Like the Behemoth quest in World, Omega Planetes is based on an MMO raid mechanic. Because of that, playing with a full DPS, Tank, Support/Healer party is the best way to complete this quest. Lance and Gunlance can easily take Enmity or aggro by attacking Omega’s head. Dual Blade, Long Sword, and Great Sword should focus on destroying its legs for trips and cancelling its Pankorator frenzy mode. Meanwhile, Sword and Shield with Wide-Range or Hunting Horn should keep up constant heal and buff for other Hunters.
Do note that for the normal Omega Planetes quests (Planetes Protocol), playing with Support Hunters NPC is completely viable. They actually pull aggro, take Mustard Bombs away, and use Pictomancer gesture as good as real Hunters. We suggest to bring these characters for the best result:
- Alessa or Fabius as Tank.
- Mina as Support/DPS.
- Kai as Support.
- Olivia as DPS.
For the gear, you will want to bring these:
- +20 Fire Resistant gear to avoid Fireblight and lessens other fire damages.
- Guard and Guard Up skills for shielded weapons.
- Thunder primary weapon for Omega Planetes.
- Fire or Paralysis secondary weapon for Nerscylla Clone.
Omega Planetes Monster Hunter Wilds Attacks
- Rocket Punch: Rocket fist attack that homes in on each player. Can be destroyed or blocked with with shielded weapons or a shield.
- Omega Micros Summon: Omega throws out a bunch of Micros that will self-destruct on players. Destroy the glowing one for a shield.
- Leg Stomp and Body Slam: Standard physical attacks, can be blocked and Offset.
- Dash Booster Attack: Omega will charge up his rear booster and dash towards a target. Can be blocked. Can be spammed to three times in the last phase.
- Flamethrower: Omega can shoot out flames in four directions or cover its underneath with flames. Can be blocked with Guard Up, ice debris, or a shield.
- Single-target Missile: A missile that tracks one player with an AOE marker. Can be dodged and blocked. Will be spammed in the fourth and last phase.
- MRV Missile: Missiles that homes in on each player’s last position. Can be dodged and blocked. Will be spammed in the fourth and last phase.
- Mustard Bomb: An AOE missile that tracks one player and leaves a permanent puddle of fire that deal massive damage over time. Keep it away from your teammates.
- Pantokrator Mode: Omega will go berserk and become much more aggresive. Cancel this mode by destroying one of its legs.
- During this mode Omega can trash around for a couple of seconds, dealing an extremely massive damage if you got struck.
- Larboard/Starboard Wave Cannon: A half-circle exploding laser attack. Larboard is the left-side while Starboard is the right-side of where Omega Planetes is facing.
- Wave Cannon: A blinding beam of light; sweeps when no Enmity, single-target when there’s an Enmity. This is a one-hit kill move in the “Planetes Protocol (Savage)” quest. Can be blocked with Guard Up, ice debris, or a shield.
- HP Penalty Bubble: A bubble that removes an Enmity player’s max health. Can be blocked by an ice debris or dodged with Evade Window. The debuff will disappear over time when the player is not in Enmity.
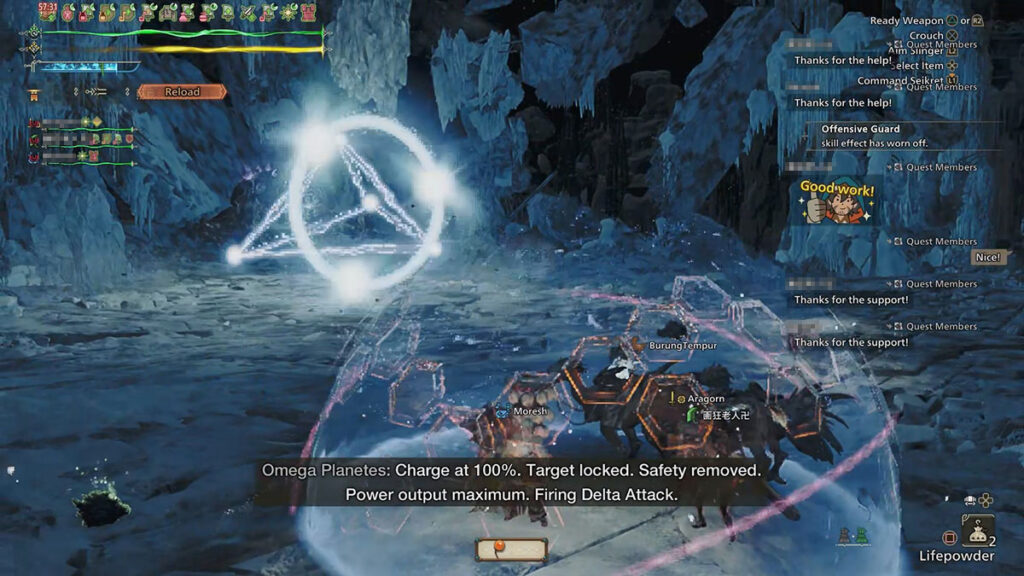
- Delta Attack: Omega’s ultimate move during the third phase. Quickly defeat the Nerscylla Clone to generate a shield to hide behind.
Omega Planetes (Savage) comes with one additional move: Jin Dahaad‘s frost breath that inflicts Frostblight and freezes you in place. When someone got frozen, it’ll always follow-up with a dash attack and kill them. For that reason you’ll want to bring a Cleanser on you, Guard Up, or slot in Bind Resistance.
How Shield and Omega Planetes’ Delta Attack Work
Shield will protect anyone inside from almost all of Omega’s attack, except physical ones like the leg stomps, body slams, and dash. The standard Shields can be generated by:
- Destroying head wounds.
- Taking out silver, glowing Omega Micros.
- Shield Generator slinger ammo, dropped after destroying one of Omega’s legs.
Speaking of Micro Omegas, you can get Red Extract from them if you’re using Insect Glaive. That way, you don’t have to get in the Tank’s line of fire just to grab the Extract from Omega’s head.
Once you reach halfway of the third phase, Omega Planetes will charge up its Delta Attack beam. This is a team-wipe move that can only be defended by a special Shield generated from defeating the summoned Nerscylla Clone.
Like normal Nerscylla, it is extremely weak against Fire and Paralysis. But there are also additional tool that will help you defeat it faster. Scattered all over the arena are Cactuars and Morbol Seedlings. When activated, a Cactuar will shoot up needles that deal up to 1,000 damages. Meanwhile, Morbol Seedlings can perform Bad Breath that Paralyzes the Nerscylla. Just make sure you get away from the Bad Breath puddle yourself, otherwise you’ll be inflicted with Paralysis, Poison, and Stench!
Don’t Sleep on the Soul of Pictomancer Gesture!
(Click to expand)
(Click to expand)
Completing the “A Covert Check” and beating Nerscylla Clone will reward you with the Soul of Pictomancer gesture. This gesture can actually deal huge amount of damage against Omega. Every time you use it, it will cycle through these three attacks with a 30 seconds cooldown for each:
- Pom Motif: 46-55 damage per hit.
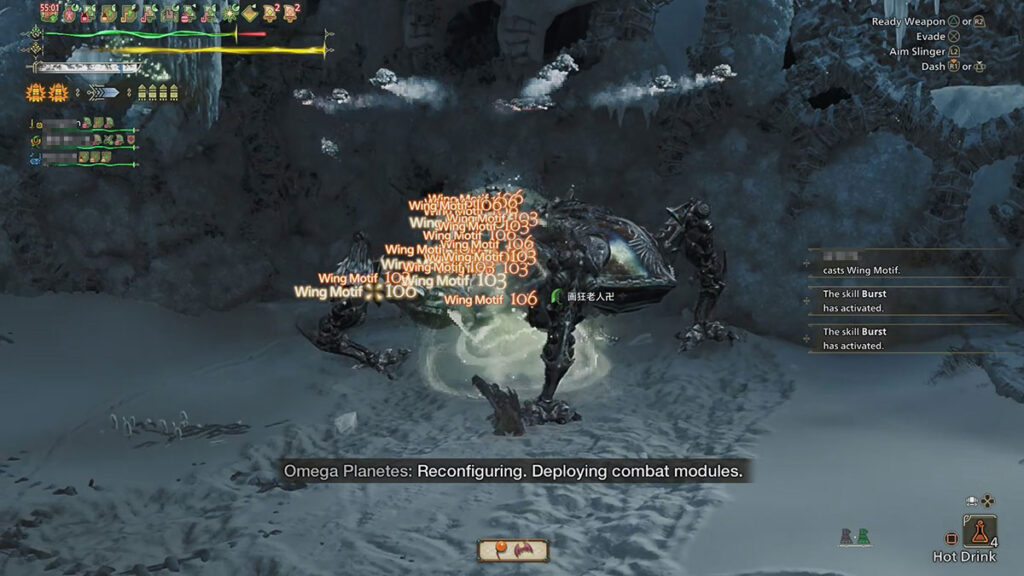
- Wind Motif: 103-109 damage per hit.
- Mog of the Ages: 1,025-1,028 damage per hit.
How much damage Pictomancy dish out actually depends on where the gesture hit. For example, Wind Motif hitting only one part of Omega can deal damages to 8 times. Meanwhile, hitting a Wind Motif right in the middle of Omega’s body can damage it for 30 times.
Pictomancy gesture doesn’t only work on Omega, you can use it against the Nerscylla as well. Four Hunters hitting Mog of the Ages when the Nerscylla spawns can eat half of its health easily.
Also remember that all of ice blocks from Jin Dahaad’s quest can be used against Omega Planetes too. Each block deals around 600 damage and will interrupt it from casting attacks!
Omega Planetes Weak Points and Elemental Weaknesses in Monster Hunter Wilds
Just like how you need a specialized party, you’ll also need specialized equipment to defeat Omega Planetes. We’ve included a table so you can see which weapons to bring and which parts receive the most damage.
- Recommended Elemental Attacks: Thunder and Dragon.
Effective Status Effects
| Status | Effectiveness |
|---|---|
| Poison | X |
| Sleep | X |
| Paralysis | ★ |
| Blastblight | ★★ |
| Stun | ★ |
| Exhaust | X |
- Effective Items: None.
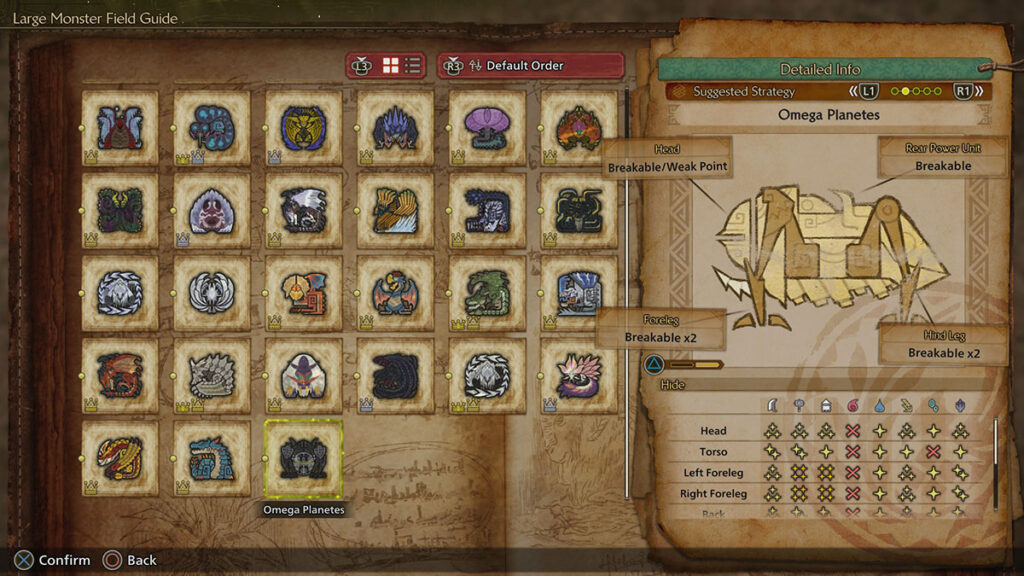
Breakable Parts and Weakness Per Monster Part
- Head.
- Forelegs and Hindlegs.
| Slash Damage | Blunt Damage | Pierce Damage | Fire | Water | Thunder | Ice | Dragon | |
| Head | ★★★ | ★★★ | ★★★ | X | ★ | ★★★ | ★ | ★★★ |
| Torso | ★★ | ★★ | ★ | X | ★ | ★ | X | ★ |
| Left Foreleg | ★★★ | ★★★★ | ★★★★ | X | ★ | ★★★ | ★ | ★★ |
| Right Foreleg | ★★★ | ★★★★ | ★★★★ | X | ★ | ★★★ | ★ | ★★ |
| Back | ★★★ | ★★ | ★★ | X | ★ | ★★★ | ★ | ★★ |
| Left Hind Leg | ★★★★ | ★★★ | ★★★ | X | ★ | ★★★ | ★ | ★★ |
| Right Hind Leg | ★★★★ | ★★★ | ★★★ | X | ★ | ★★★ | ★ | ★★ |
| Rear Power Unit | ★★★★ | ★★★ | ★ | X | ★ | ★★ | ★ | ★★★★ |
Omega Planetes Loot Table in Monster Hunter Wilds
For those farming this monster, here’s the full loot table for Lagiacrus in High Rank of Monster Hunter Wilds.
High Rank Loot Table
| Target Rewards | Broken Part Rewards | Carving | Wound Destroyed | |
| Omega Pedal | 18% | Legs: 100% | 20% | 20% |
| Omega Screw | 25% | N/A | 28% | 40% |
| Omega Lens | 13% | Head: 100% | 13% | N/A |
| Omega Axle | 11% | Rear: 100% | 11% | N/A |
| Omega Spring | 23% | N/A | 24% | 40% |
| Omega Data 1.0 | 8% | N/A | N/A | N/A |
| Omega Data 2.0 | 8% | N/A | N/A | N/A |
| Omega Nodule | 2% | N/A | 3% | N/A |
Omega Screw also drops from Omega Micros. Omega Data 2.0 can only be obtained from “Omega Planetes (Savage)” quest.
Craftable Items
(Click to expand)
(Click to expand)
Last but not least, here’s the complete list of every Omega Planetes-related item in Monster Hunter Wilds.
| Item | Parts | Perks |
|---|---|---|
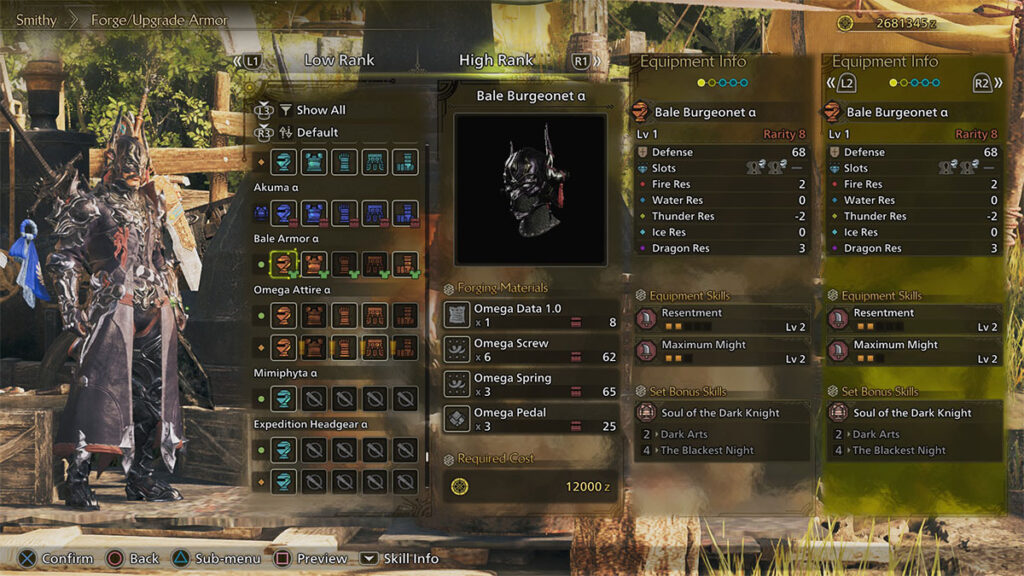
| Bale Armor α | – Omega Data 1.0 x5 – Omega Screw x21 – Omega Spring x7 – Omega Pedal x6 – Omega Lens x5 – Omega Axle x5 – Novacrystal x2 – Omega Nodule x2 | – Resentment Lv5 – Maximum Might Lv3 – Latent Power Lv5 – Quick Sheathe Lv2 – Constitution Lv2 Group Skill: Soul of the Dark Knight – Dark Arts (2-pieces) – The Blackest Night (4-pieces) |
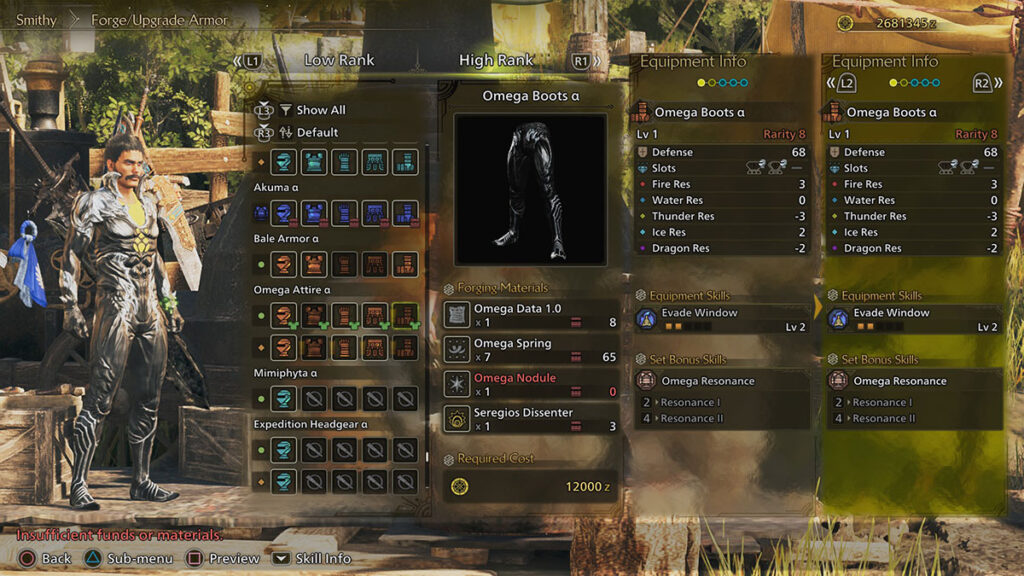
| Omega Attire α | – Omega Data 2.0 x3 – Omega Data 1.0 x2 – Omega Screw x18 – Omega Pedal x3 – Omega Spring x14 – Omega Lens x3 – Omega Axle x3 – Omega Nodule x2 – Lagiacrus Sapphire x1 – Arkveld Gem x1 – Faux Whitegleam Orb x1 – Mizutsune Water Orb x1 – Seregios Dissenter x3 | – Weakness Exploit Lv1 – Divine Blessing Lv3 – Partbreaker Lv2 – Evade Window Lv2 – Agitator Lv1 – Burst Lv1 Group Skill: Omega Resonance – Resonance I (2-pieces) – Resonance II (4-pieces) |
| Shadowbringer (Great Sword) | Shadowbringer – Omega Data 1.0 x1 – Omega Screw x7 – Omega Pedal x5 – Omega Lens x4 True Shadowbringer – Omega Data 1.0 x1 – Omega Spring x6 – Omega Axle x4 – Omega Nodule x1 | Lagiacrus Blade I – Darkside Lv1 True Shadowbringer – Darkside Lv1 |
| Omega’s Rod (Insect Glaive) | Omega’s Rod – Omega Data 1.0 x1 – Omega Screw x8 – Omega Pedal x6 – Omega Nodule x1 True Omega’s Rod – Omega Data 2.0 x1 – Omega Spring x7 – Omega Lens x5 – Omega Axle x5 | Omega’s Rod – Synergy Lv1 True Omega’s Rod – Synergy Lv1 |
| Omega’s Sword (Sword & Shield) | Omega’s Sword – Omega Data 1.0 x1 – Omega Screw x8 – Omega Pedal x6 – Omega Nodule x1 True Omega’s Sword – Omega Data 2.0 x1 – Omega Spring x7 – Omega Lens x5 – Omega Axle x5 | Omega’s Sword – Guard Up Lv3 – Synthetic Shield Lv1 True Omega’s Sword – Guard Up Lv3 – Synthetic Shield Lv1 |
| Morbol Seedling α (Palico armor) | – Omega Data 1.0 x2 – Omega Screw x2 | 60 Defense |
| Twinflight Butterflies α (Palico weapon) | – Omega Data 1.0 x1 – Omega Pedal x1 | Severing, 47 Damage, 35 Poison |