
While Grounded 2 has many features that come straight from Grounded, there are several new and useful ones that will make exploring the park a breeze. One of the newest and creepiest features of Grounded 2 is the ability to ride Buggies. Assuming you don’t mind being on top of a red ant while you fight spiders, these Buggies are extremely helpful for exploration, combat, and even building. Here, we’ll tell you everything about this new feature and how you can get started with your own Buggy army.
Building a Hatchery

The first thing you need to do before riding Buggies in Grounded 2 is to build a Hatchery. You can get the idea to construct this station just by following the main story. After completing a few objectives for Ominent’s newest employee, you’ll get the option to purchase the Hatchery blueprints for 500 Science. Once you have it, head to your building menu and place it wherever you want. This is what you’ll need to build it:
- Stem Weed x6
- Acorn Top x1
- Acorn Shell x6
- Mite Fuzz x5
After building it, you’ll get the mission of checking the closest Ant Hill. How close it is will depend on where your base is. However, if you’re at the first Ranger’s Outpost, you can get to it quickly. Just be sure to be prepared because you’ll be facing a lot of angry ants and one deadly spider.
Obtaining Buggy Eggs
While there are two Buggies you can ride in Grounded 2, the Ant Soldier and the Orb Weaver, we’ve only found the first one, so this guide mainly shows the way to hatch your first Red Ant. However, we’ll make a separate guide to show you how to tame your Orb Weaver once we discover how to do it.
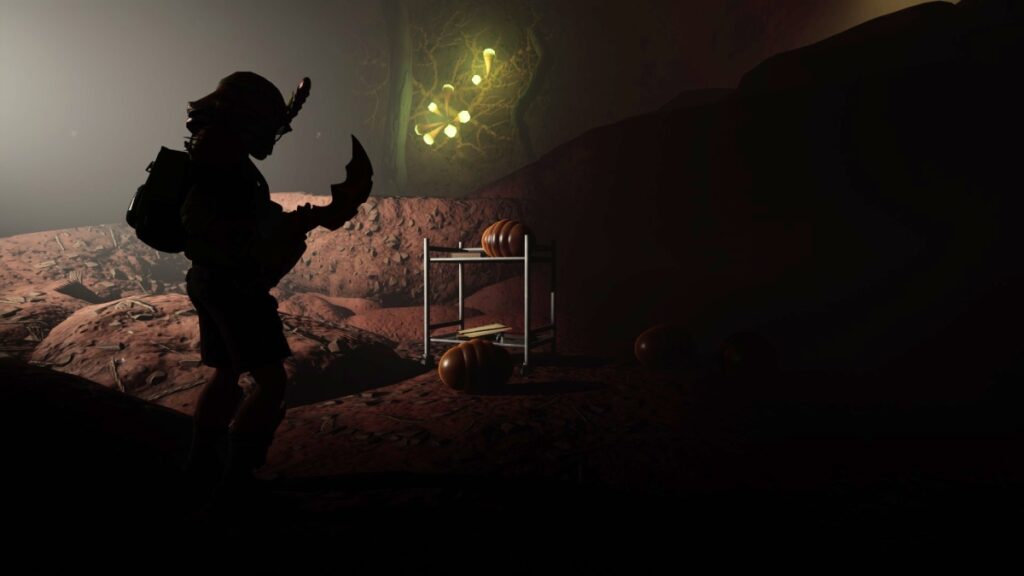
In any case, you’ll need to enter a large Ant Hill in the “Entrance” area of the map. Before going in, bring a Lean-To, so you can set your respawn outside of the cave and also try to craft some Red Ant armor, as it has some perks when fighting Ants.
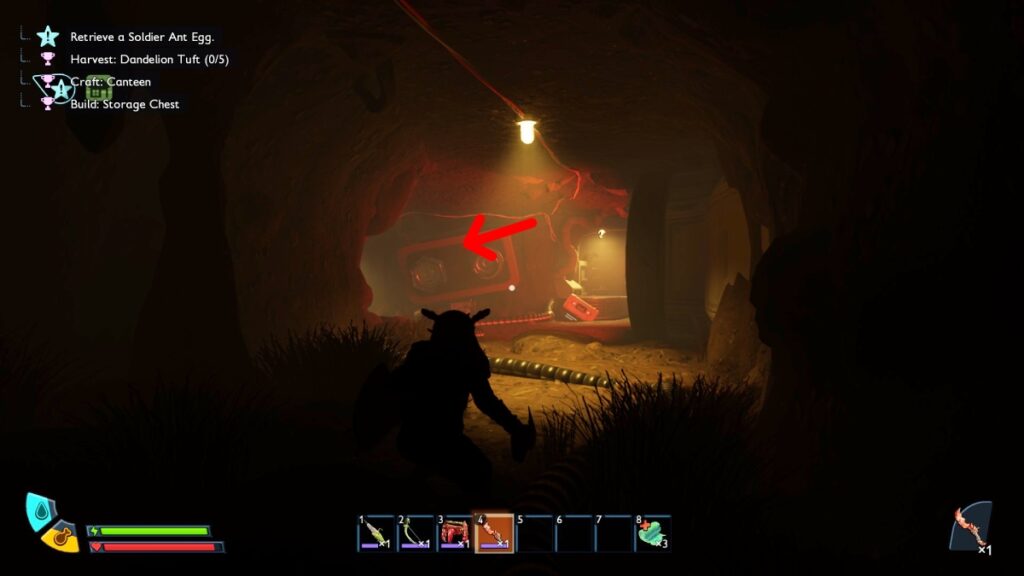
As soon as you enter, follow the power cable until you reach a broken Ominent room. Go across the room and keep following the cable underground. Eventually, you’ll find an area with bunk beds that can also help you set your respawn. We recommend doing so because there are a lot of Red Ant Soldiers around.
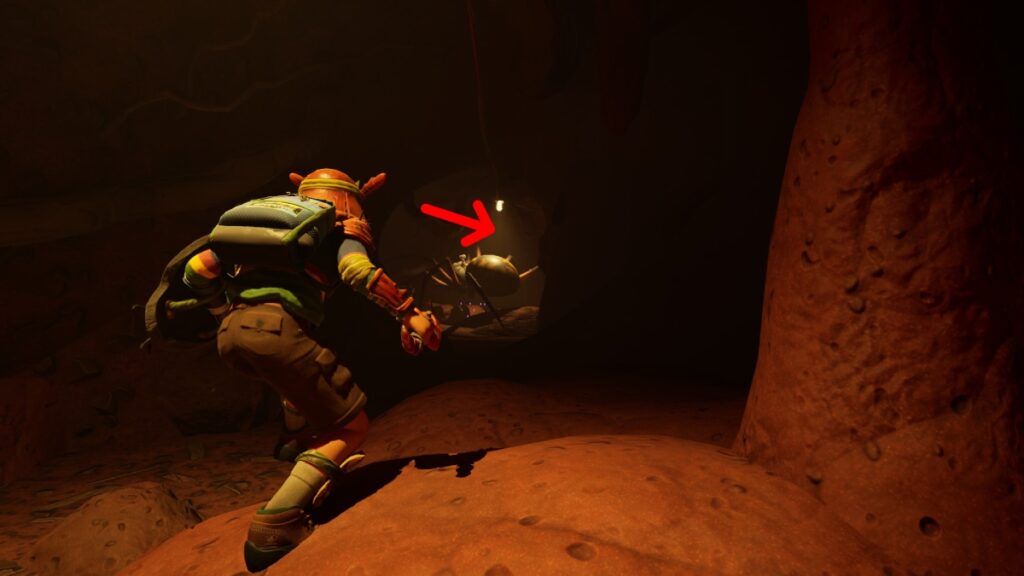
Keep following the cable until you spot a purple flashing light. This light is bad news because it is an O.R.C. Weaver. Yes, mind-controlled insects are back. We don’t recommend facing this creature. With the armor you have, you’ll get defeated with one hit. Instead, you can use the “cheese tactic” we discovered.
The O.R.C. Weaver seems to have a limited range when it comes to following you. It will always stop at the little entrance that’s next to it, which is where you’ll see it for the first time. If you really want to defeat it, bring a bow and arrows, and shoot it. It might go to an underground location, so try to follow it and keep shooting at it. If you leave it alone for long, it will regenerate its HP.
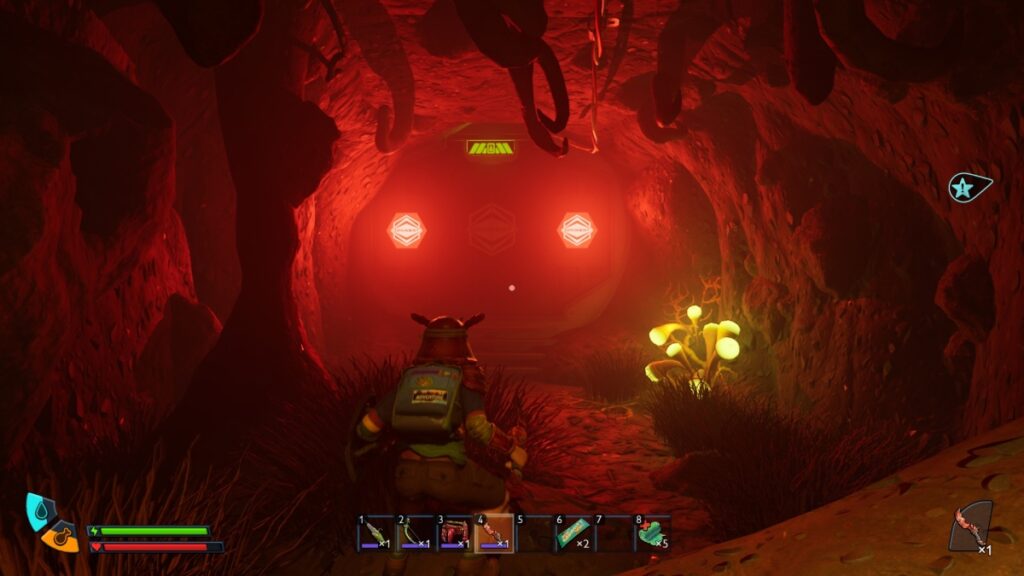
Another tactic you can use is waiting for the Weaver to move underground, following the cable, and entering the Ominent building that has a Red Ant Soldier egg. You can’t grab this one, but there’s a room full of them nearby. Go across the container with the egg and keep following the tunnel until you find the dead scientist.
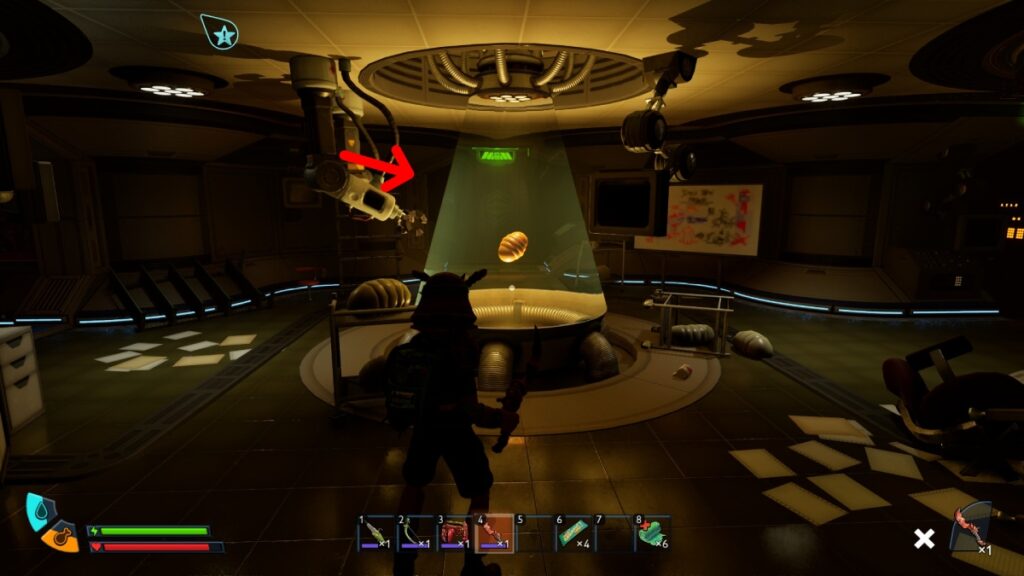
Use your shovel to dig the chest out, grab the items, and get the Red Ant Soldier egg. Follow the cable back to the entrance, ignoring all enemies in the process. The egg is like a grass plank, meaning you have to carry it instead of being able to chuck it inside your inventory.
Hatching the Egg
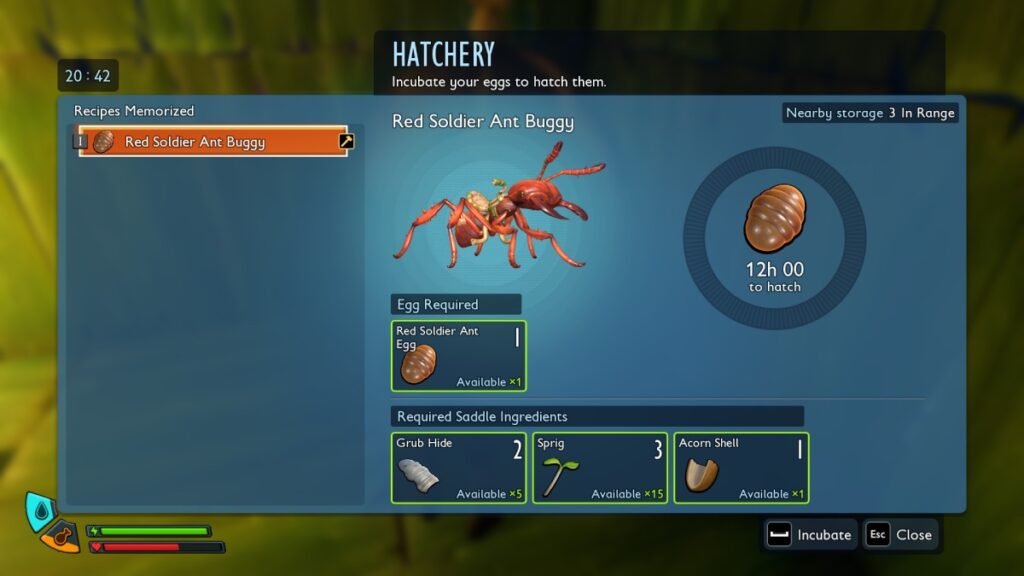
Once you’ve returned safely (or so we hope) to your base, it is time to hatch your first egg and ride your first Buggie in Grounded 2. For this case, we’ll use the Red Ant Soldier as an example.
You need to approach your Hatchery with the egg on hand and drop it inside. After that, it will ask you for other resources to hatch the egg. In the case of the Red Ant Soldier egg, you’ll need these:
- Grub Hide x2
- Sprig x3
- Acorn Shell x1
Once you have all the resources, and the egg, of course, just wait for the egg to hatch. You can see the timer by interacting with the Hatchery, so just go to bed (in-game) and wait until it is ready. Once it is done, approach the Hatchery again and ride away.
Riding Your Buggy
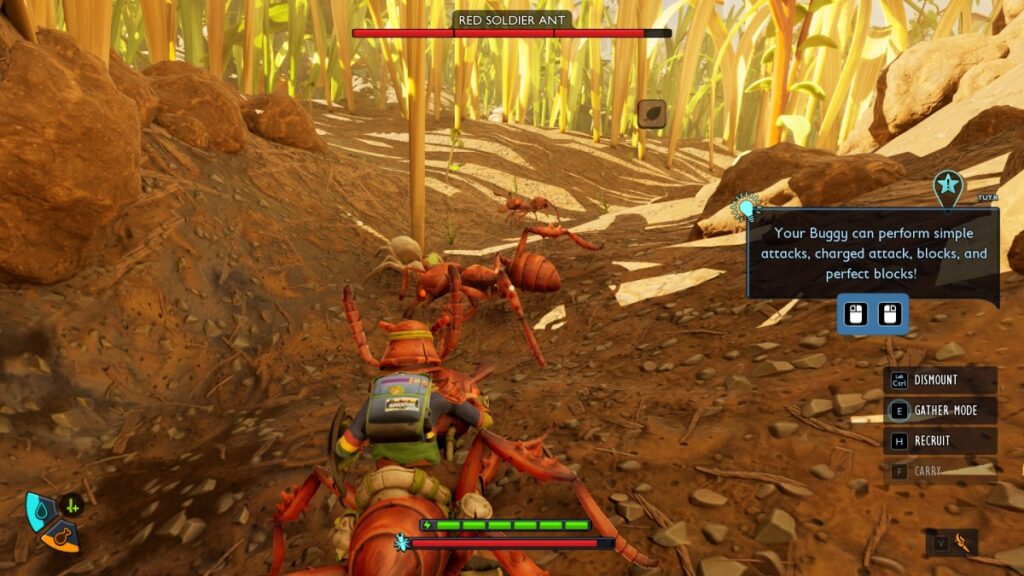
Riding Buggies in Grounded 2 has a lot of benefits, which will also change depending on the Buggy you have. For the Red Ant Soldier, you can use it to break through some walls in underground areas, fight, carry a few items, such as grass planks, and traverse the park faster.
- E: Approach your Buggy and ride it.
- Left Ctrl: Dismount.
- Left Click: Attack/Chop.
- Right Click: Block.
- Left Shift: Dash.
- Spacebar: Jump.
- H: Recruit other Ants to fight alongside you.
- T: Recall your Buggy, while dismounted.
As we mentioned, this is the process to ride your first Buggy in Grounded 2, but since there are other rideable Buggies on the way, we’ll be making guides for each one, as we imagine the process will be as daunting as the one to get your Red Ant Soldier.